A Stoneworld Group Company
Porcelain paving has become a popular choice for outdoor spaces thanks to its low maintenance, non-porous surface, and modern appearance. However, laying porcelain requires a slightly different approach compared to natural stone paving.
However, laying porcelain paving comes with different techniques. You are probably wondering what would be the most practical and correct way to do it. We know that porcelain paving can have its challenges. Therefore, we have prepared a guide for you that will explain how to lay porcelain paving properly.

Start by marking out your paving area and excavating to the required depth. For most patios, you will need to allow for:
Check your levels and ensure a gentle fall (approx. 1:60 gradient) away from buildings for drainage.
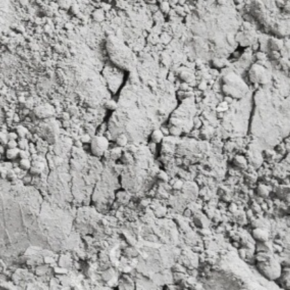
A strong, well-compacted sub-base is essential for preventing movement and cracking.
We recommend MOT Type 1 or scalpings compacted in layers until you reach the required depth.
This layer should be:
Free draining to avoid frost damage
Evenly spread and level
Firm underfoot when walked on

Prepare a mortar mix of at least 6:1 mixed sand to cement, which is to be laid as a full bed. More accuracy is required here than might ordinarily be needed with a natural stone patio, as in the next step you will not have as much leeway for tamping down slabs to achieve their perfect level.

Please note – This is the difference between most stone paving and porcelain paving.
Due to the non-porous nature of porcelain paving, it is necessary to create a bonding bridge, so that the slabs will adhere to the base. Omitting this step can cause the paving to fail quite rapidly after laying.
Before starting to lay the porcelain slabs it is necessary to prime the rear surface of each slab using NEXUS porcelain paving primer – one tub will cover approximately 27.5 m2. Paint the reverse side of each slab with either a ‘slurry mix’- a wet cement mix, or a proprietary resin based primer. The slurry mix is the cheaper method, but can be messy, whereas the pre-prepared primer is easier to use, though more expensive.
Lay the primed porcelain pavers on the full bed of mortar 40-50mm thick.
We often receive queries regarding this point, as some experienced landscapers will lay porcelain slabs on ‘pedestals’ (i.e. several 50mm high blobs of mortar- at each corner and in the centre) or work over the top of an existing patio or hard surface. Neither of these methods are incorrect, however, they are not fool proof methods.
To ensure a good finished result that has longevity, a solid sub-base should be created. Any movement beneath the patio will eventually cause cracking on the patio surface. Furthermore, when working over an existing surface, it is very important to ensure that the increased height does not breach the damp proof course on any adjacent buildings.
As a result we recommend the full mortar bed method.
Pavers will require tamping into position. Although porcelain pavers are strong, they will not withstand excessive hammering, therefore careful efficient tamping down is required. In order to get a strong bond between the mortar bed and the underside of the slab it is necessary to ensure at least 70% of the paver is in contact with the mortar bed.
This stage is the most important as the strength of the completed surface relies on the bond between the mortar and the slab.
As the pavers are laid, joints of 6mm should be left, using spacers to ensure an even jointing space throughout.
There are many suitable materials available to create the pointing joint; at Stoneworld we favour NEXUS porcelain paving grout. This will create a perfect joint.

Please call us on 01844 279274 or email us at sales@stoneworld.co.uk for any further advice you require. Our knowledgeable staff are always on hand for tips and advice. Alternatively, you can fill in the enquiry form below and one of our team will be in touch shortly.
