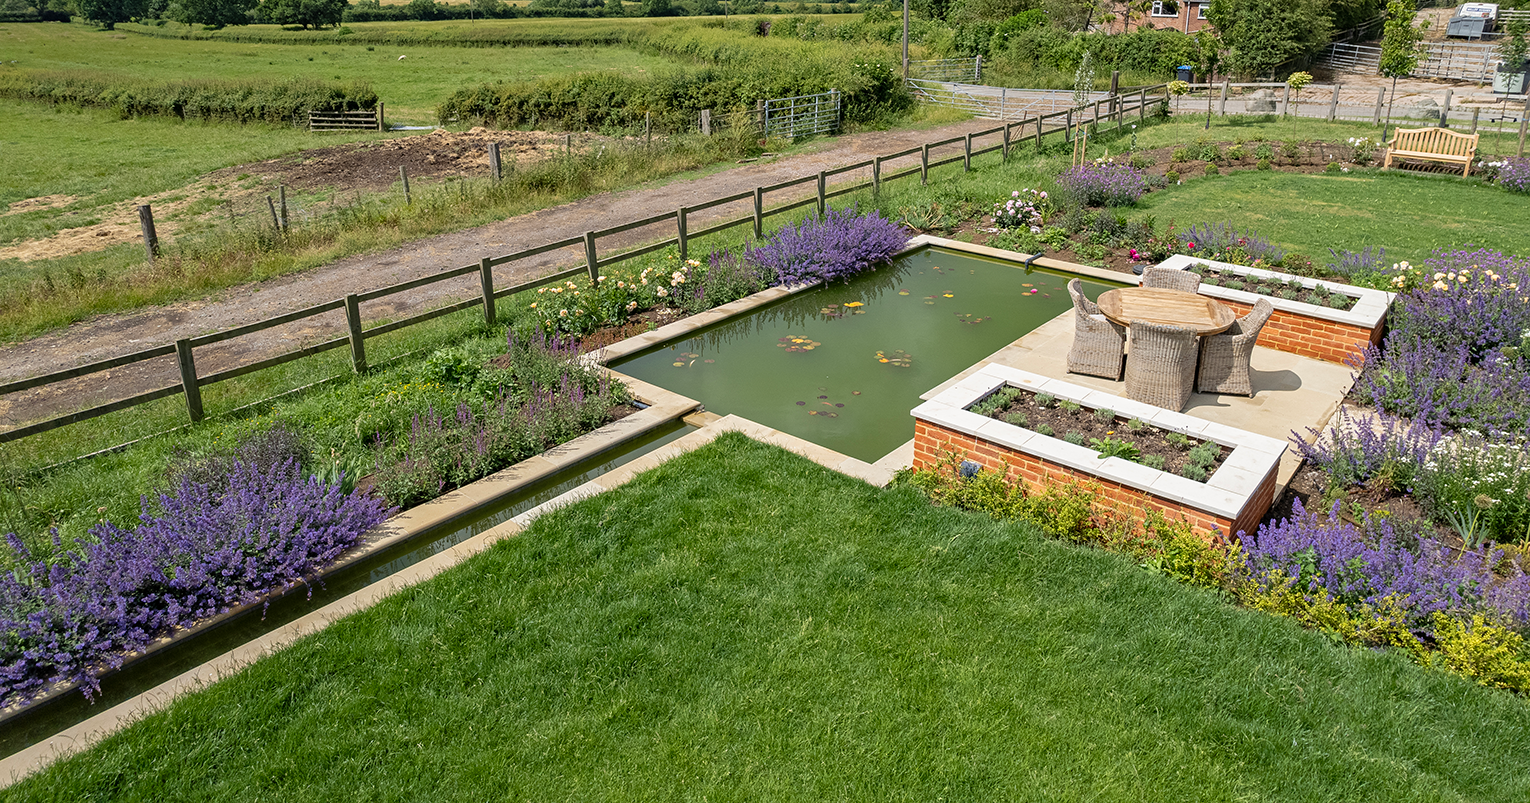
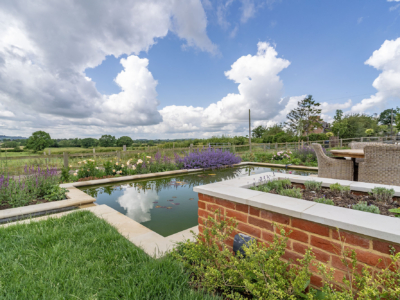
For many garden enthusiasts, learning how to build a garden rill can transform a yard into a tranquil retreat with the soothing sound of running water. A garden rill is essentially a formal channel of water – a shallow, narrow stream or canal – that flows through your landscape. According to the University of Florida’s IFAS Extension, rills are “narrow rivulets that channel running water through the landscape through concrete or stone pavement”. In other words, a rill is like a mini-stream running in a dedicated trough. It can be still or flowing, depending on design, and adds both movement and calm to a garden.

Garden rills have a long history. Grand examples exist at places like the Alhambra Palace in Spain, where these channels once brought cooling water to hot spaces. Today, they’re popular in all climates, even cooler ones. In the UK, for example, a rill’s reflective water can bring extra light and movement into a garden on a drab day. The gentle sound of water also masks noise and creates a peaceful ambiance. This blend of aesthetic beauty and relaxing sound is why many designers love adding rills to outdoor spaces.
In this guide, we’ll cover everything you need to know on how to build a garden rill – from planning and materials to construction steps and finishing touches. You’ll learn pro tips on site selection, water flow, and even troubleshooting. By the end, you’ll feel confident tackling the project and creating your own beautiful water channel.
Benefits of a Garden Rill
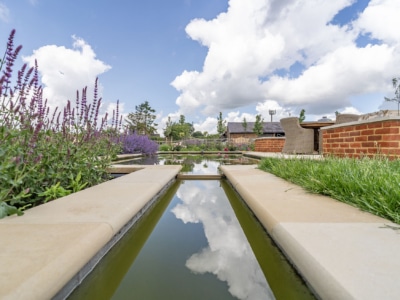
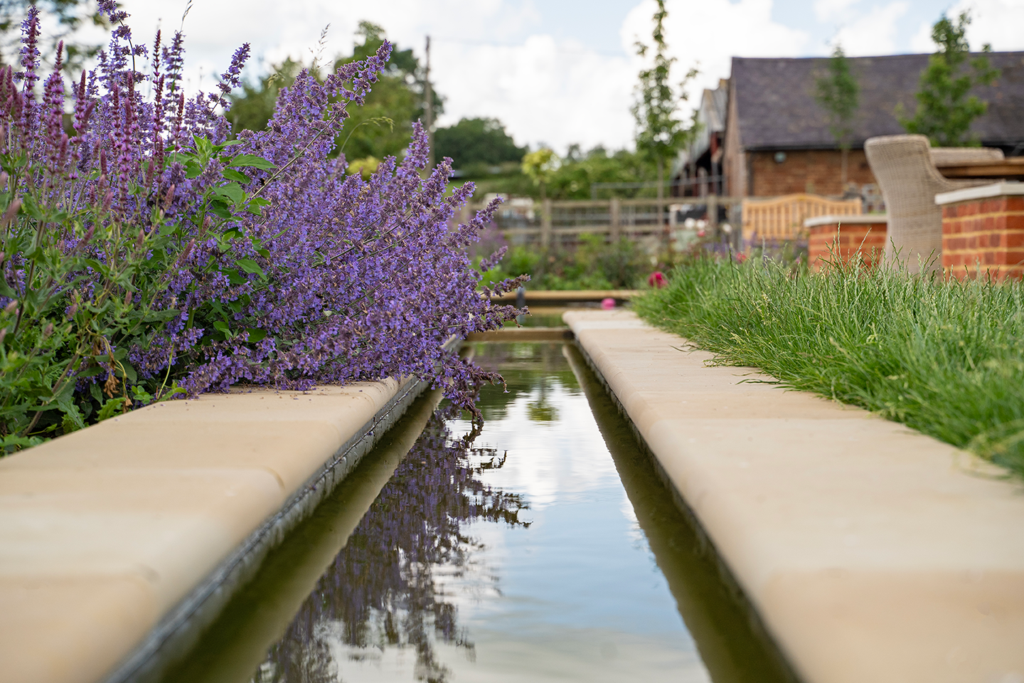
A garden rill offers many benefits that go beyond looks. The gentle trickle of water creates a soothing soundscape, which can mask unwanted noise from traffic or neighbours. The moving water surface reflects sunlight, adding sparkle and perceived space to your yard. In fact, design experts note that even a shallow water channel “brings reflective water that brings light and movement into the garden”, brightening shady areas.
Rills can also help cool your garden. On a hot day, dipping hands or feet into the cool flowing water is refreshing. The evaporative cooling effect of a water feature can make the surrounding air feel slightly cooler and more comfortable. Additionally, the presence of water can attract birds, butterflies, and beneficial insects, enriching the garden ecosystem.
Finally, a rill is simply a charming focal point. It adds elegance and a sense of luxury to landscaping. Whether you picture a sleek modern steel channel or a rustic stone trough, the rill becomes a conversation piece and a relaxing visual feature. Overall, the combination of visual appeal, sound, and ambiance makes a garden rill a rewarding addition to many outdoor spaces.
Planning Your Garden Rill
A successful rill starts with good planning. Before grabbing a shovel, consider location, layout, and how you will supply water. Let’s break down the key planning steps.
Choosing the Right Location
It’s recommended for starting your rill project by carefully considering its location. The best position is one where the rill can be easily seen and appreciated – after all, it’s a beautiful design feature that adds movement and sound to your outdoor space. Ideal placements include running it alongside a main garden path, beside your patio, or aligning it with a key focal point like a sculpture or a seating area. As a linear water feature, a rill is perfect for drawing the eye and naturally dividing different garden zones.
You can also install a rill close to your home, but this requires careful planning. If it runs up to the building, it’s essential to properly waterproof the surrounding area to protect the damp-proof course and prevent any risk of water ingress. We always stress this during installations to avoid long-term issues. It’s also worth considering light levels – placing your rill in partial shade can help keep the water cool and reduce algae growth. Try to avoid areas with heavy leaf fall or difficult access for pumps, as this can affect maintenance and performance.
Designing the Rill Layout
Next, plan the size and shape of the channel. Most garden rills are straight or gently curved. Decide on the length (which depends on your garden size) and whether the channel will end in a pond, basin, or just flow back into itself. As a general guide, rills are fairly shallow: The suggestion is about 30–60 cm wide and 24–45 cm deep. This makes them easy to maintain and keeps them safe for family use. Of course, you can adjust these dimensions for your taste, but wider channels will require more digging and water to fill.
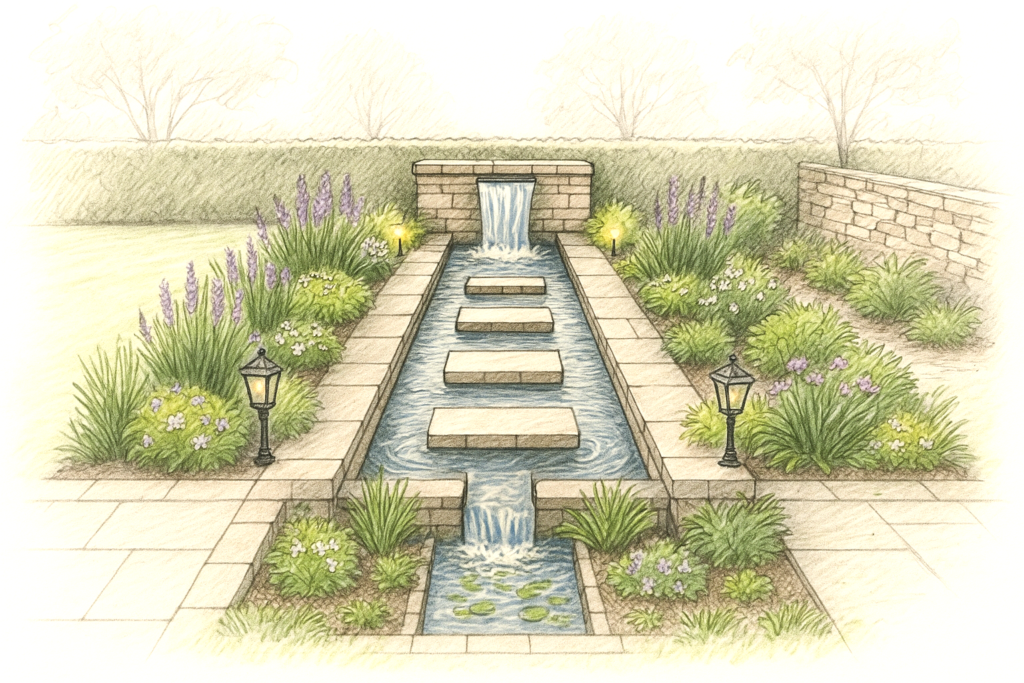
The cross-section of the rill should be fairly uniform. The edging stones must be level along the full length of the channel. In other words, keep both walls perfectly even to create a classic symmetrical look. If you want water to flow, decide on a gentle slope from the start to the end (even a 1% drop can be enough). Too steep a drop will make the water race and spill; too flat and the water may stagnate. If your design calls for water to feed into a lower pond or reservoir, be sure to include that gradient in the planning.
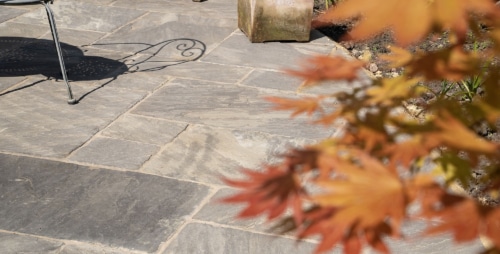
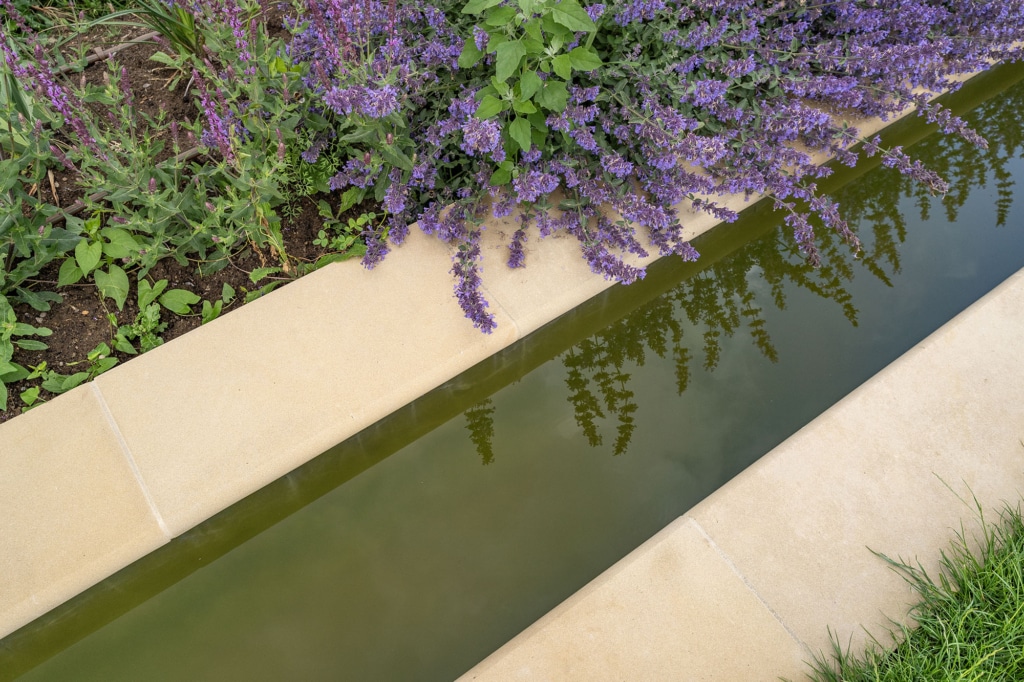
Also choose a style that fits your garden. For a modern look, plan for smooth edges and sleek materials (like steel or black stone). For a traditional or natural look, irregular cut stone or bricks can be used to blend the rill with existing paths. The key is to pick an edge material (coping stones or bricks) that matches your overall garden design. In short, sketch out the path on paper or mark it with stakes, check slope and space, and finalize the basic layout before any digging begins.
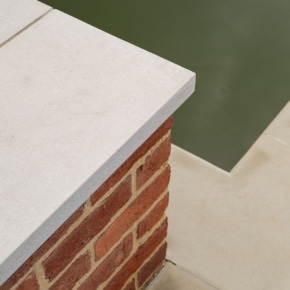
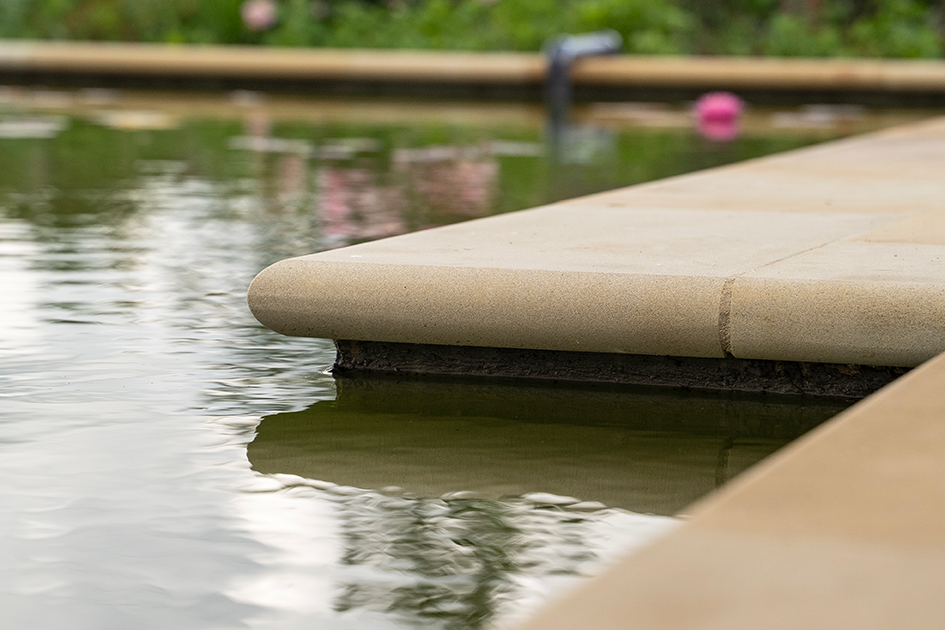
Coping Stones
Ensuring Water Supply and Flow
A rill is attractive because water moves, so plan how you’ll keep that water flowing. Most rills use a recirculating pump. Typically you dig a small reservoir (or place a sealed container) at one end of the rill. The water stays in this hidden tank and feeds a submersible pump. The pump pushes water up to the start of the rill (often through a tube or pipe), and gravity carries it back down the channel, creating a closed loop. This way the water continuously cycles without wasting much.
If you don’t want to use a pump, another option is to have a gravity-fed system. For example, if you have a higher water source (like a rooftop tank or a rainwater barrel set above the channel), the water can flow down by itself into the rill. However, this requires a constant higher water level and is less common. In most home gardens, using an electric pump is more reliable.
Make sure you have electrical access. Ideally, an outdoor outlet (or extension cable) should reach the reservoir. The pump cord and tubing must be protected: many builders run them through buried PVC conduit. The tubing typically connects under the rill or along a parallel trench to keep it hidden. Plan your power source and keep safety in mind: use an RCD outlet and keep cords out of standing water. With flow decided and routing planned, you’re ready to gather tools and materials.
Tools and Materials Needed
Having the right tools and materials on hand will make building your rill much smoother. Below is a table of essentials you’ll use:
| Tool/Material | Purpose |
|---|---|
| Shovel or Spade | Digging trenches, the reservoir hole, and removing soil. |
| Spirit Level or Laser Level | Ensuring the trench bottom and edges are even and sloped. |
| Tape Measure and Stakes | Marking out dimensions and the rill’s path accurately. |
| Wheelbarrow | Moving excavated soil, gravel, or mixed concrete. |
| Builder’s Sand or Gravel | Base layer in trench for stability and leveling. |
| Butyl Pond Liner or EPDM | Waterproof lining for the trench and reservoir. |
| Concrete Mix (or Cement) | Creating a sturdy channel base and forming the walls. |
| Coping Stones or Bricks | Decorative edging stones for the top of the rill walls. |
| Submersible Water Pump | Circulates water from the reservoir back through the rill. |
| Tubing and PVC Conduit | Connects pump to channel outlet and protects electrical cord. |
Gathering these items first will prevent interruptions once work begins. You may already have some tools in your shed, and materials like coping stones can be sourced from Stoneworld. Having everything ready also helps estimate costs accurately.
Step-by-Step: How to Build a Garden Rill
Follow these steps to construct your rill. Each step builds on the last, so take your time and double-check work before moving on.
- Mark and Dig the Trench: Outline the channel on the ground using string or stakes. Dig the trench to your planned dimensions, making it slightly larger (about 10 cm wider and deeper) than the final size. This extra space allows room for liner and concrete. If water needs to flow downhill, include a slight grade toward the planned end point. Also dig the reservoir hole at the down-gradient end – this should be large enough to hold the pump and plenty of water for re-circulation.
- Create the Reservoir: Dig a larger pit for the reservoir (often at the lowest point of the rill). The reservoir can be a concrete box, a buried container, or simply more open space. Line the bottom and sides of the reservoir with sand and then the pond liner. This liner holds the water and hides the container. The reservoir should be roomy enough so the pump is fully submerged even when water level falls a bit. A larger reservoir means you’ll add water (from rain or tap) less often.
- Line the Trench: Cover the entire trench bottom and sides with a 2–3 cm layer of builder’s sand or fine gravel. This creates a smooth base for the liner. Now lay your heavy-duty pond liner on top. Ensure the liner is centered in the trench and runs up and over the edges. Smooth it out so there are no big wrinkles or air pockets. Leave several centimetres of extra liner hanging over each edge – you’ll trim it later after the concrete is poured.
- Set Up Formwork: Cut straight boards or plywood to the trench depth (height) and the length of the rill. These will act as side forms for the concrete. Stand the boards along each side of the trench, outside the liner, about 3 cm above the liner’s top edge. Brace these boards with stakes so that the inner edges align perfectly with the line of the channel. Check the boards are straight and the tops are level with each other. Once in place, these forms will hold back the wet concrete and define the final width of the channel.
- Pour Concrete Channel: Mix concrete (or cement mortar) to a pourable consistency. Carefully pour a 5–8 cm thick layer onto the trench bottom, spreading it evenly. Trowel it smooth. Then fill the spaces between the side forms and the pond liner to build up the channel walls. Use a straightedge to ensure the top of the concrete is flush with the forms. Make sure the concrete walls are vertical and cleanly meet the bottom layer. If you want a decorative finish, you can texture the concrete surface before it sets.
- Remove Forms and Cure: Once you’ve poured and levelled the concrete, allow it to set briefly (a few hours) and then remove the side forms. Smooth any edges or joints. It’s crucial to let the concrete cure fully for strength. Light foot traffic is okay after a day or two, but ideally leave it alone for about one week. Keep the concrete moist (you can mist it with water) to prevent cracking. Do not pour water into it during this curing period.
- Build the End Wall (Header): Now build a small wall at the end of the channel opposite the reservoir. Use bricks or stones and mortar to form a barrier 3–5 cm taller than your planned water depth. This wall, often called the header or end stop, keeps water from spilling out the end. Before finishing the wall, insert a short length of PVC pipe or conduit that lines up with your pump tubing. This will be the hole through which water is delivered back into the rill from the pump. Mortar around the pipe to seal it. Allow the mortar to set so the wall is stable.
- Install Pump and Plumbing: Attach the flexible tubing to your submersible water pump according to its instructions. Place the pump in the reservoir pit. Run the tubing from the pump up to the top of the channel, feeding it through the PVC pipe in the header wall. This tubing will act like a miniature waterfall or spout when water flows into the rill. Also feed the pump’s electrical cord through a PVC conduit for protection. Once set up, the pump will draw water from the reservoir and send it up through the rill.
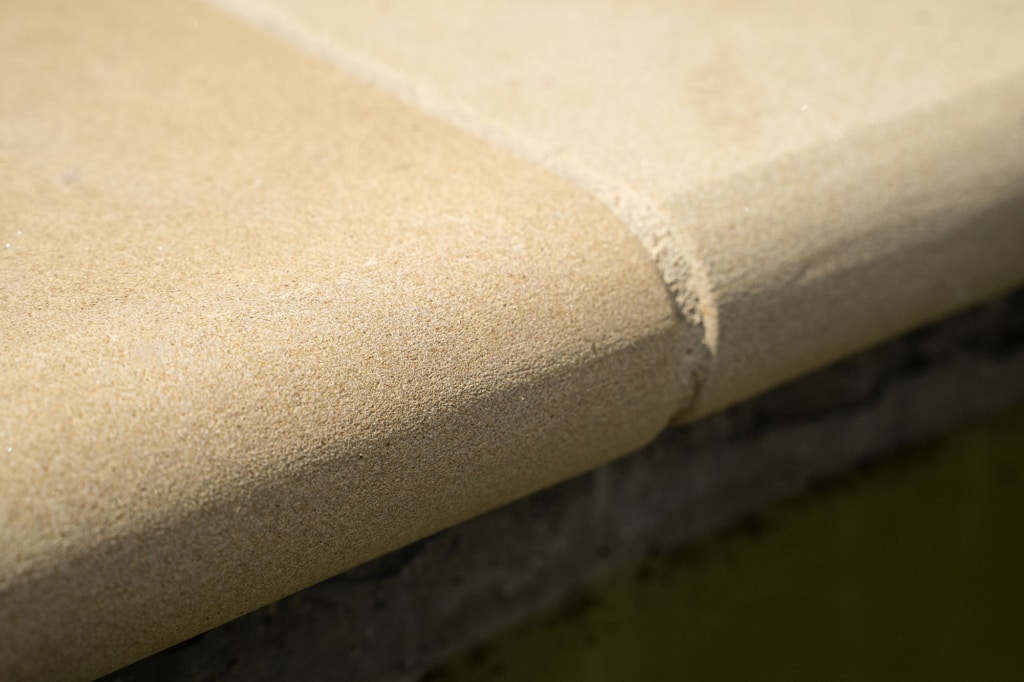
- Finish Edges and Landscaping: Lay your chosen coping stones or bricks along both edges of the rill. Align them carefully so the top edges are perfectly level – this gives a neat, “engineered” look and ensures an even flow. Fill any gaps between stones with mortar or gravel. Make sure the edges are smooth and safe underfoot. Cover any exposed liner at the edges with soil or decorative gravel so the liner is not visible. Blend the reservoir edges into the garden by placing plants, stones or decking around it.
- Fill and Test: Finally, fill the reservoir with water. Turn on the pump and watch the water flow through the rill. Adjust the flow if possible (some pumps have a dial). The water level should be high enough in the reservoir so the pump stays submerged even if some evaporates. Check for leaks along the channel edges or liner. The flow should be gentle and steady; if it’s too weak, double-check for kinks in the tubing or debris in the pump filter. Once everything is working, tidy up the surrounding soil, and consider planting edge vegetation as final touches.
With these steps, your new garden rill channel will be fully functional. The process is much like building a very shallow pond – waterproofing, structure, and flow control are all key. Take safety precautions (concrete work, electricity near water) and you’ll be rewarded with a stunning water feature.
Enhancements and Landscaping Tips
Once your rill is built, you can turn it into a true garden feature with thoughtful finishing touches. Plant moisture-loving greenery along the edges to soften the concrete. Good choices include ferns, marsh marigolds, water irises, and creeping thyme. These bog plants thrive on the wet edges and look at home by water. In fact, one garden expert notes you can even use the basins along a rill for bog planting – imagine small water-loving flowers or grasses in a shallow pool area.
For added interest, consider decorative stones. You could fill the channel bottom with flat river pebbles or slate chips, or even embed stepping stones in the liner so you can walk across the shallow water. Small LED spotlights (rated for outdoor use) tucked along the edge will make the water sparkle at night. A spotlight shining up through the water can create beautiful moving patterns.
The choice of edging material also defines the style. For a clean, modern aesthetic, polished concrete slabs or dark basalt coping stones look sleek. In a cottage garden, rough-cut stone or brick will blend in better. A rill’s formal lines suit contemporary gardens, but it can be styled to traditional landscapes by using sympathetic materials. Finally, try adding a few accessories: a stone basin at the end, a small fountain head dripping into the rill, or a bench nearby to enjoy the view. These touches make your rill not just a water feature, but an integrated part of the garden experience.
Maintenance and Troubleshooting
Keeping your garden rill running smoothly takes some routine care. Because rills hold water, they can collect leaves and debris. Check the water and remove any floating junk weekly. Clean out the reservoir and channel bottom of sediment if you see any build up. Water levels drop over time due to evaporation; top it up regularly so the pump never runs dry.
Algae can be an issue, especially in warm weather or bright sun. Tiny water bodies heat up fast, containers can become green with algae if neglected. To prevent this, scrub the channel walls or liner once a month, or add an aquarium-safe algaecide or UV clarifier. You can also introduce hardy water plants (like water lilies) that compete with algae, or some duckweed and small fish to nibble on algae.
Check the pump periodically. Turn it off and clean the inlet filter to remove any leaves or silt. Make sure tubing isn’t kinked and that all seals around pipes are tight. In winter, you have two choices: either drain the water to avoid freezing or keep the pump running if the climate is mild (running water won’t freeze as easily as stagnant water). If frost is heavy, it’s safer to remove the pump and drain the rill for the season. Covering nearby plants or the pump housing can also protect equipment from ice.
Common problems include leaks and low flow. If you see leaks, pinpoint the hole in the liner and patch it with waterproof sealant or a liner repair kit. If the flow suddenly drops, check the pump and tubing for blockages. Sometimes air gets trapped, so re-submerge the pump fully or open an air bleed. By catching small issues early – a little gel sealant or a pump check – you’ll maintain a clear, steady stream and avoid major fixes later. With a little upkeep, your garden rill will stay charming and reliable year after year.
Common Mistakes to Avoid
Even with careful planning, builders can slip up. Here are some pitfalls to watch out for:
- Poor Levelling or Slope: If the trench walls or stones are not set perfectly level, water will pool unevenly or spill on one side. To achieve the elegant form of a rill, it’s imperative that both edges of the rill are level all the way down. Always double-check levels and gradient at each step.
- Skipping Waterproofing: Never assume bare earth will hold water. Failing to line the channel or reservoir with a proper pond liner will lead to leaks. Also, if the rill is near a house, neglecting to protect the foundation (damp proof course) can cause structural water damage.
- Wrong Pump Size: Using too small a pump or one with insufficient lift can result in a weak flow or no flow at all. Calculate the vertical lift and length of the run, then get a pump rated above that. A powerful pump is easier to throttle back than a weak pump that can’t reach.
- Neglecting the Reservoir: A reservoir that’s too small or not covered can dry out or overflow easily. Make sure yours is at least a third of the channel’s volume and that the pump remains submerged as levels change.
- Unsafe Edges: Sharp or jagged stone edges can be a hazard. Chamfer or smooth cut edges if possible. Keep sides low enough (and shallow) if children will be around. While a rill is shallow, accidents can still happen, so supervise young kids near any water feature.
By avoiding these mistakes, you’ll save time and money. Checking your work often and asking for help on tricky parts (like leveling) will help you build a rill that looks professional and functions flawlessly.
Frequently Asked Questions
1. What is a garden rill?
A garden rill is a narrow, shallow channel or mini-canal of water created as a decorative feature. It’s essentially a man-made rivulet running through the garden. Think of it as a small, formal stream that can be still or gently flowing, built with waterproof lining and edged in stone or concrete.
2. Why add a garden rill to my garden?
Rills add beauty, movement, and relaxing water sounds. They make gardens feel serene and can reflect light to brighten an area. A rill can also cool the air on hot days and attract wildlife like birds. In short, it enhances the garden’s atmosphere.
3. Where should I place a garden rill?
Choose a spot where it will be seen and enjoyed. Good places include along a pathway, next to a patio, or leading the eye to a focal point. You’ll need space for a hidden reservoir or pump. Placing it “where it can be viewed to appreciate” and possibly linking different garden areas. Just avoid very close proximity to structures unless proper waterproofing is in place.
4. How deep and wide should my garden rill be?
Most rills are fairly shallow and narrow. A common guideline is about 30–60 cm wide and 24–45 cm deep. However, you can adjust size for your space and preference. Just remember: a wider or deeper channel needs more water and work to build. Stay consistent with depth and keep the sides level to avoid uneven flow.
5. What materials and tools do I need?
You’ll need basic garden and masonry tools (shovel, level, tape measure, wheelbarrow, etc.) and materials like pond liner (butyl or EPDM), concrete or mortar, gravel, and edging stones. A submersible pump and tubing are essential for water circulation. See the Tools and Materials table above for a full list. Quality materials (thick liner, sturdy stones) make the rill last longer.
6. Do I need a pump or electricity for the rill?
Yes, typically. Most garden rills use an electric submersible pump to circulate water. The pump sits in the reservoir and pushes water up to the channel start. You will need to provide power (an outdoor outlet or extension) near the reservoir. If you want purely gravity-fed flow, you’d need a higher water source feeding the rill, which is less common.
7. Can I build a garden rill myself or should I hire a professional?
A handy DIYer can definitely build a rill, but it requires precise work. Levelling both edges and creating a leak-proof channel are tricky. It’s recommended a landscape specialist for the accuracy needed. If you have basic masonry skills and time, you can do it yourself. Otherwise, consider hiring help for parts like concrete pouring or pump installation.
8. How do I start building a garden rill?
Begin by planning and marking the path. Then dig the trench about 5–10 cm larger than your final channel, as described above. Excavate a reservoir pit at one end. Line the trench with sand and a pond liner. From there, follow the step-by-step guide: set up formwork, pour concrete, build the end wall, and install the pump. Each step should be done carefully in order.
9. How long does it take to build a garden rill?
It varies by size, but expect several days of work. Excavation might take a day or two. Pouring concrete and building walls is another day. Crucially, concrete needs time to cure – often 5–7 days for full strength. So count on at least one to two weeks from start to finish, including curing time. Working steadily and allowing for cure will give the best results.
10. How much will it cost to build a garden rill?
Costs depend on size, materials, and whether you hire labour. A small DIY rill might cost a few hundred dollars/euros for concrete, liner, stones, and pump. A larger, elaborate rill with high-end stone edging and professional installation could be several thousand. Getting quotes for materials (liner, pump) and labour can help. Remember, it’s an investment in a long-lasting garden feature.
11. What plants or landscaping ideas work well around a rill?
Planting is where you can get creative. Water-loving plants like ferns, hostas, marsh marigolds, and sweet flag make the edges look lush. Creeping groundcovers or grasses soften the sides. You can also add decorative touches like small statues, stepping stones, or gravel beds. Lighting is great too: submersible LED lights or spotlights will highlight the rill after dark.
12. How do I keep the water clean and clear?
Maintain the rill like a small pond. Remove leaves and debris regularly. Trim back plants so they don’t block the flow. Top up water lost to evaporation. If the water becomes cloudy, clean the liner or stones. Some people install a small filter or skimmer in the reservoir. For a natural approach, add a few aquatic plants or fish (like mosquito-eating minnows) to help keep water clear.
13. How do I prevent algae or mosquitoes?
Flowing water resists mosquitoes since they prefer still water. To minimize algae, keep the water moving and shaded if possible. As Gardens Illustrated notes, stagnant ponds can “become green with algae” quicklygardensillustrated.com, so a rill’s motion helps. You can also use a UV clarifier or mild algaecide (safe for fish) in the reservoir. Adding mosquito dunks (with bacteria toxic to larvae) can stop mosquitoes if any water pools.
14. What type of liner is best to use for a rill?
Use a flexible, durable pond liner made for water features. Butyl rubber (EPDM) liners are popular; they are thick, UV-resistant, and can handle ground movement. Avoid ordinary plastic sheeting. You’ll need enough liner to cover the entire trench and reservoir with some overlap. The liner should be at least 1–2 mm thick for longevity.
15. Will the water in my rill freeze in winter?
The surface water can freeze, but the flowing water is less likely to ice solid. In cold climates, the safest approach is to winterize the rill: either keep a gentle flow (if your pump and power supply can handle freezing air) or drain the water and store the pump. At minimum, remove or insulate the pump. If you leave some water in, cover or skip the rill with a non-sharp cover to keep debris out.
16. Can I use rainwater to supply my garden rill?
Yes – you can pipe rainwater into the reservoir instead of (or in addition to) tap water. Many people connect a rain barrel or gutter system. Just be aware you still need a pump to circulate, unless your rain barrel is higher than the rill. Using rainwater is eco-friendly and keeps it topped up between refills.
17. Can I connect a garden rill to an existing pond or fountain?
You can design a rill to feed or draw from other features. For instance, a rill might flow into a pond at the end, or a pond’s pump might feed the rill upstream. The key is managing water levels: if you combine them, ensure the lower pond holds the extra water. If linking to a fountain, the fountain’s drop can become part of the rill. Just make sure pumps are compatible and total flow is balanced.
18. What pump size do I need?
Pump size depends on rill length and height difference. A good rule is to allow the pump to handle 10–20 cm of head per 50–100 cm of rill length. Check the pump specs: it should have enough head (lift) to reach the top of the rill from the reservoir. When in doubt, choose a slightly stronger pump that you can throttle down. Better too powerful than too weak, so you can adjust the flow rate.
19. What common mistakes should I avoid?
Common pitfalls include misjudging the slope, not levelling the channel, or skipping the waterproof liner. That even a small gradient error can cause water to sit or spill. Also avoid placing it in hard-to-reach spots; you’ll need access for maintenance. Double-check all measurements before you dig, and measure twice when setting the level of stones and concrete. Taking your time to avoid mistakes will pay off with a properly flowing rill.
20. Is it safe for children or pets?
A garden rill is quite shallow (often only a few inches of water), making it safer than a deep pond. It’s generally low-risk, but it is still water, so supervision is wise with small children or pets. Make sure edges are smooth and non-slip. Since it’s shallow, falls are unlikely to be dangerous, but careful finishes (rounded edges, non-toxic materials) will keep everyone safe.
21. Do I need planning permission to build a garden rill?
In most places, a small garden rill is considered a minor garden structure, so no special planning permission is usually needed. However, rules vary by location. If your rill is very large, covers a big area, or affects drainage, check with your local planning authority or homeowner’s association. It’s always better to ask if unsure, especially if you’re changing water flow on a significant scale.
Projects for Inspiration
Conclusion
Building a garden rill can be a highly rewarding project. With proper planning and materials, you can create a professional-looking water feature that adds both value and enjoyment to your yard. Remember to carefully level the channel, use a reliable liner and pump, and follow the step-by-step guide above. Regular maintenance will keep the water clear and the pump running smoothly.
By following these expert tips and avoiding common pitfalls, even a DIY enthusiast can build a garden rill like a pro. The result will be a beautiful, relaxing focal point: the gentle sound of water and a reflective, moving surface that transforms your garden. Now that you know how to build a garden rill – from excavation to planting – you have everything needed to start your own waterway. Happy building and enjoy your new tranquil retreat!


