A Stoneworld Group Company
When it comes to landscaping, the choice of materials can impact the appearance, durability, and maintenance of your outdoor space. Self-binding gravel is a highly versatile and hard-wearing limestone gravel, which is respected for its performance, natural appearance, and ease of installation.

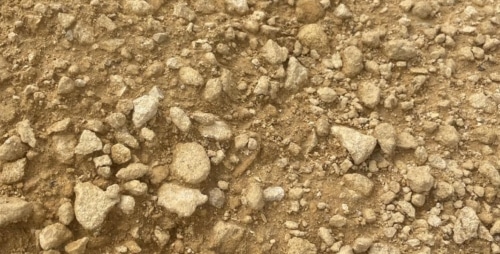
Self-binding gravel is a mixture of dust, sand and clay that combines the natural look of traditional gravel with the practicality of a solid, bonded base. It comes in a size range of 12mm to fines (smaller than 1mm), making it ideal for various applications, including paths, driveways, hard-standing areas, parks, and bridleways. Our range of Cream and Yellow Self-Binding Gravel complements both contemporary and classic outdoor design styles.
Following these steps will ensure a solid, long-lasting finish:
1. Ground Preparation
Proper preparation of the ground is crucial before laying self-binding gravel. This involves digging the area and laying a weed suppressant membrane to prevent unwanted growth.
2. Sub-base Layer
Spread and compact Type 1 Sub-base Scalpings to create a strong, well-draining foundation for your self-binding gravel. For paths and footways, use a roller with a minimum weight of 1.5 tons. For driveways, opt for a roller weighing at least 2.5 tons. Compaction is key, and you may need to make several passes to achieve the desired level of compaction.
3. Spreading and Levelling
Spread the self-binding gravel evenly at a thickness of 75mm to achieve a compacted 50mm finish. This step sets the stage for a solid, well-bonded surface.

4. Compaction
To compact the gravel, use a roller of similar weight to the one used for the sub-base. Ensure that there’s a slight fall to prevent water pooling, allowing for proper drainage.
5. Quality Check
Regularly check for an even fall and appearance, ensuring uniform coverage. For larger areas, verify that the distance before the first point of drainage doesn’t exceed 4 meters.

6. Water Rolling
Water rolling is a critical step to achieve a well-bonded finish. You can either use a water roller or spray sufficient water and then roll the gravel again. The goal is to float the fines to the top surface of the gravel. If the gravel sticks to the roller, add more water to create a flood that pushes forward as the roller moves across the surface.
7. Final Touches
If there are any lines or grooves, use a soft, wide broom to gently pass over the surface while it’s still wet to achieve a uniform finish.
When working on a large area, aim to complete all the steps on the same day to ensure a seamless finish. Additionally, newly laid areas can be butted up against existing material, provided you use a neat edge.
One crucial point to remember is that self-binding gravel requires time to dry before it can be used effectively. Depending on environmental conditions, this drying period can take up to two weeks. Additionally, it’s essential to avoid laying self-binding gravel in freezing conditions to ensure the best results.
If you have any questions, please call our team on 01844 279274 or email us at sales@stoneworld.co.uk and we will be happy to help.